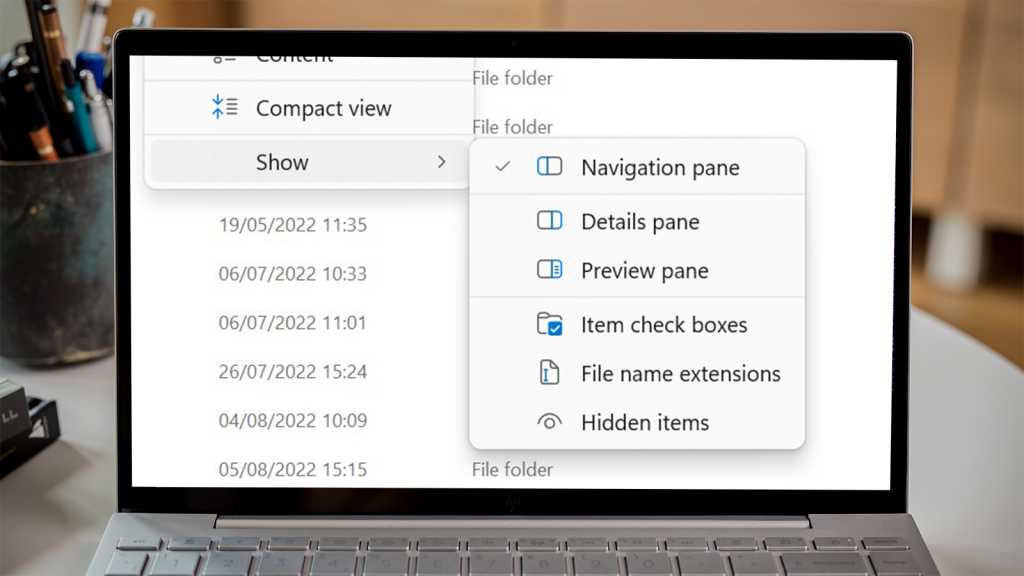
On Windows 11, File Explorer acts as a hub for all the files stored on your computer. That includes personal documents and photos, but also important system files and app data.
Not only do you not require access to most of these, accessing them and making changes could cause serious problems for your device. Equally, there may simply be personal files that you’d rather no-one else can see.
Fortunately, Microsoft lets you hide any file or folder in Windows 11, and it requires only a few simple steps. Accessing them again is relatively easy, too – here’s how to do both.
How to hide a file or folder in Windows 11
If a file or folder can be found in File Explorer, it can be hidden. Here’s how:
Select any files/folders and open Properties
Anyron Copeman / Foundry
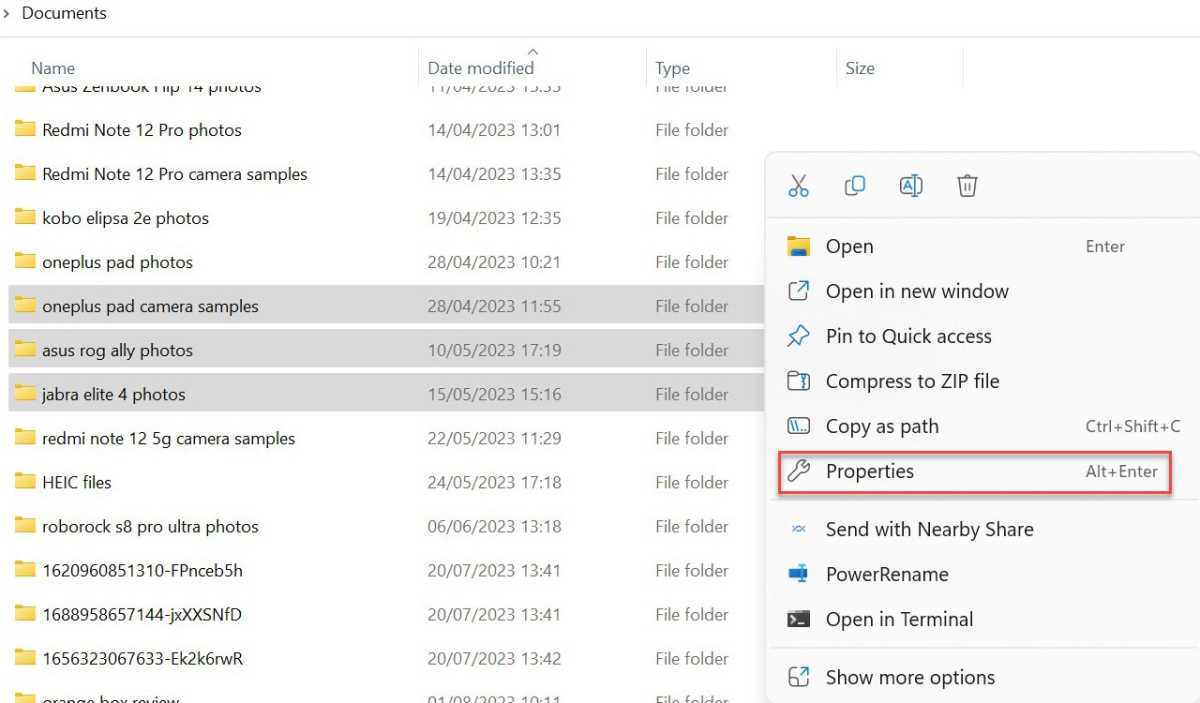
Open File Explorer. Find any file or folder that you’d like to hide and highlight them (you can choose several at once by holding down Ctrl each time you click).
Right-click any of the selected ones and choose ‘Properties.
Add hidden attribute
Anyron Copeman / Foundry
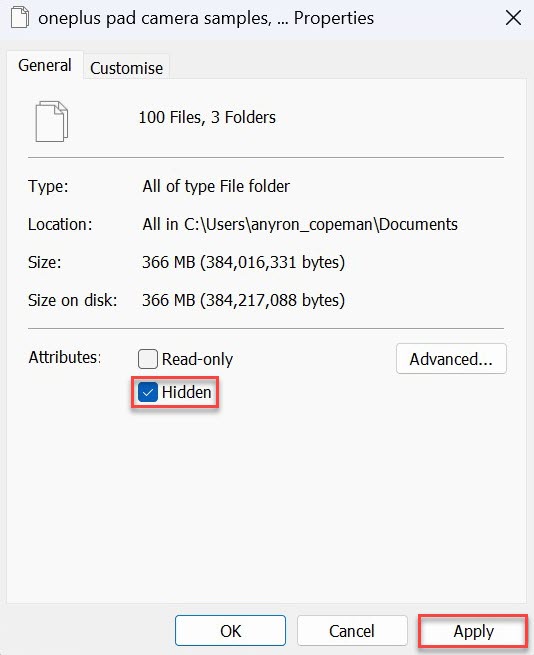
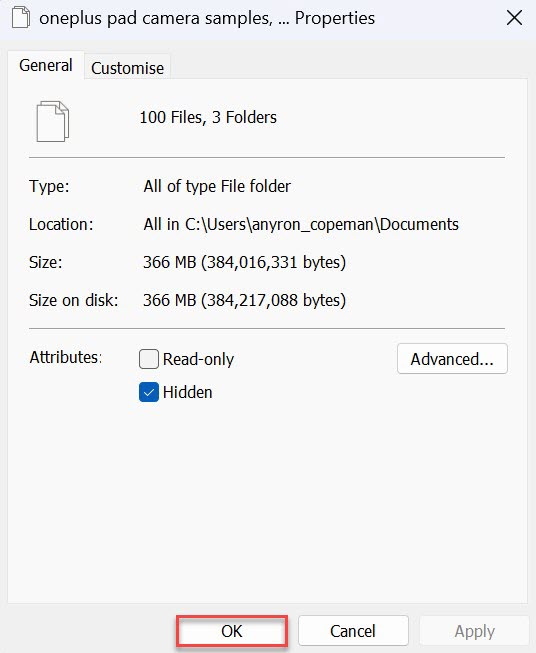
The window should open on the ‘General’ tab – select it if not.
Under ‘Attributes’, check the box next to ‘Hidden’, then click ‘Apply’.
Enable for all sub-folders and files (if applicable)
Anyron Copeman / Foundry
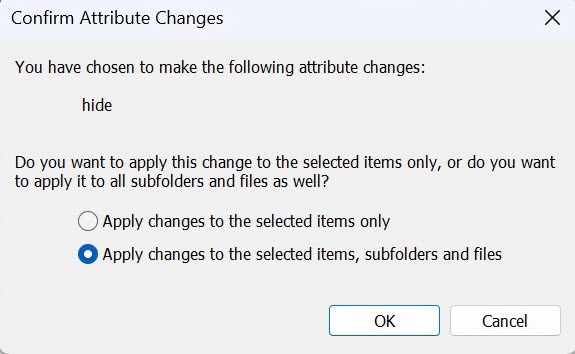
If you’ve selected a folder containing sub-folders or files, a pop-up will appear.
Make sure the button next to ‘Apply changes to this folder, subfolders and files’ is selected, then click ‘OK’.
Confirm change
Anyron Copeman / Foundry
To complete the process, click ‘OK’ to exit.
You can then repeat these steps for any other files or folders you’d like to hide. The process happens immediately, and means they’ll disappear from their usual sections and no longer appear in searches.
This file or folder will be hidden immediately and won’t show up in any searches by default.
How to unhide a file or folder in Windows 11
To stop a file from being hidden, you’ll first need to make all hidden files visible in File Explorer:
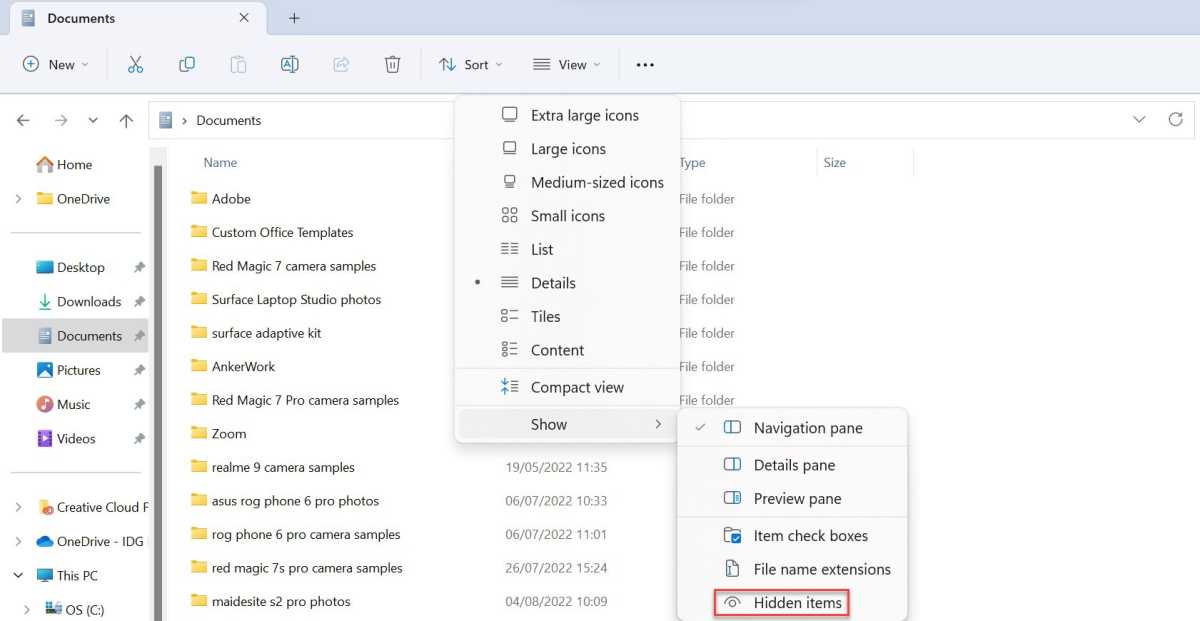
- Click the ‘View’ button at the top of the File Explorer window
- Hover over the ‘Show’ button
- From the options that appear, click ‘Hidden items’
Anyron Copeman / Foundry
If you want to view or make changes to a file or folder, this will be fully accessible and behave as normal. Once complete, repeat the steps above to hide them once more.
But if you’d like to unhide them permanently, you’ll also need to follow these steps:
- Open File Explorer and find any hidden files or folders that you’d like to unhide
- Select all that apply, then right-click and choose ‘Properties’
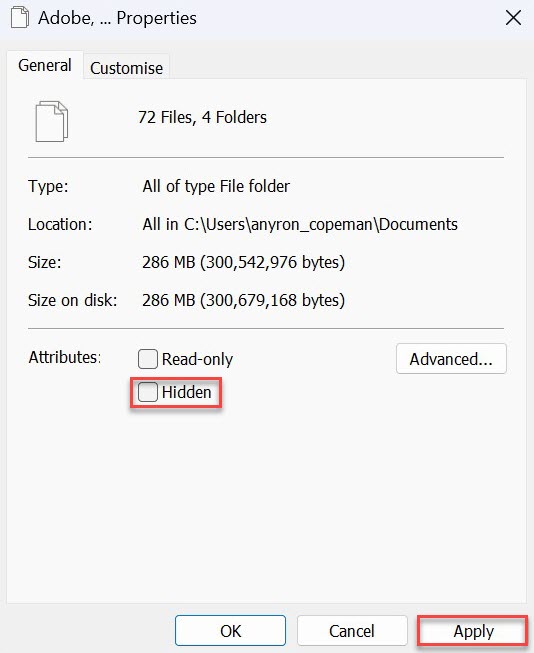
- Under the ‘General’ tab, uncheck the box under ‘Attributes’ that’s labelled ‘Hidden’. Click ‘Apply’
Anyron Copeman / Foundry
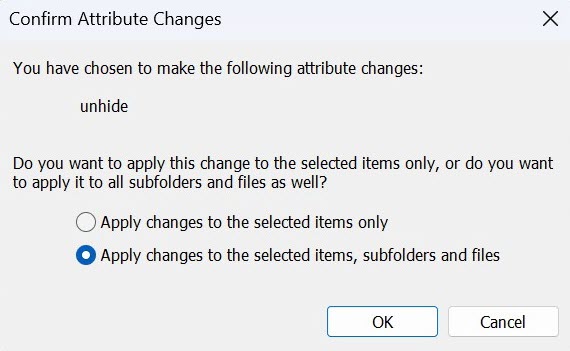
- If you’ve selected a folder containing sub-folders or files, a pop-up will appear. Make sure the button next to ‘Apply changes to this folder, subfolders and files’ is selected, then click ‘OK’
Anyron Copeman / Foundry
- Click ‘OK’ again to confirm
- Repeat for any others you’d like to unhide
How to hide or unhide a file using Command Prompt
An alternative method is available via the Command Prompt window:
- Open Command Prompt
- Paste ‘cd c:/SECRET-FILES-LOCATION’, replacing ‘SECRET-FILES-LOCATION’ with the file path in File Explorer, then hit enter
- Enter the specific name of the file or folder that you’d like to hide and hit enter
- Paste ‘attrib +h /s /d’ and hit enter.
To unhide it, repeat the steps above, but replace the command in step 4 with ‘attrib -h /s /d.
However, it’s worth emphasising that it isn’t necessary to use this method. Going via File Explorer is much easier and achieves the same result.
